STEP 2: Importing Assets & Setup
At this point you should already have your audio & video assets rendered out of After Effects, and ready to bring into DVDSP. So go ahead and start up DVD Studio Pro, and at the Welcome Screen, choose Advanced Mode, then either NTSC or PAL, and finally SD-DVD (unless you have a reason to create the outdated HD-DVD) then click 'OK'.
Import Assets
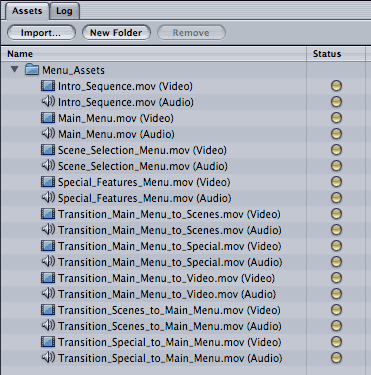
We are going to start by preparing all the Assets, Menus, and Custom Shapes before we put it all together. In the Assets tab, go ahead and Import all the video & audio files of the motion menu. You don't need to import all the main videos of your dvd yet, that can be done later. If you like to keep things organized, feel free to create a new folder for the menu assets. If you have rendered out separate audio files that are to be used with the animations instead of the audio that is attatched to the video asset, be sure to import those as well.

Note: If you used After Effects CS4 to render out your motion menus, your Intro Sequence and Main Menu will be combined into one: 'Main_Menu_with_Intro'.
Menu Logistics
There are three ways that the rendered menu transitions can be implemented:
- Using the built-in menu transition feature, then choosing 'Video Transition' and select your asset
- Create a 'Track' for the transition, with the 'End Jump' linking to the next menu
- Create a Menu, with no buttons, that doesn't loop, and apply the transition as a video background to the menu
Option 1 would be great, except for one critical flaw... IT DOESN'T SUPPORT AUDIO!
Option 2 sounds like the next logical solution to this as it would allow for audio, however, once the disc is burned, the tracks are stored in a different physical location than the menus. Often times the transition track will be placed after the main track, which causes a great deal of increased seek time between the menu and the transition, which can cause a 1 to 2 second pause before and after the transition occurs (or even longer on a dual-layer disc).
Option 3, the magical solution to all the problems of the first 2 options, and the method which we will use in this tutorial.
Creating the Menus
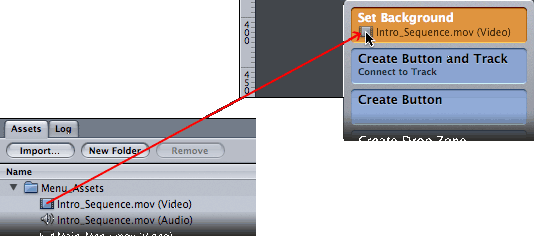
Let's setup the opening animation by dragging the video asset of the Intro Sequence into the Menu View, and 'Set Background'.
If you used After Effects CS4 to render out your motion background, drag the 'Main_Menu_with_Intro' instead.

You can now drag the audio asset into the Menu View and 'Set Audio'. If you created a separate audio file, make sure you drag over the correct one.
Now would be a good time to rename the menu we just created, so in the outline tab (upper left), make sure the 'Menu 1' is selected, then in the Menu Property Inspector (bottom right), change the name to 'Intro_Sequence' (or 'Main_Menu_with_Intro' for AE CS4 users).

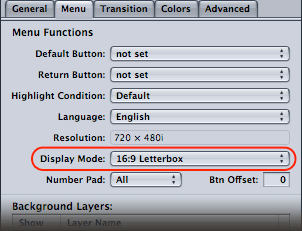
While in the property inspector, under the menu tab, lets go ahead and change the Display Mode to '16:9 Letterbox' so our menu looks the way it should.

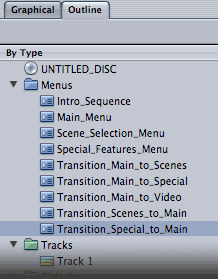
Now that our intro animation is setup, lets create the main menu (AE CS4 users have already created the Main Menu). To do this, click on 'Add Menu' in the Toolbar. Follow the same steps as the intro sequence by selecting the new menu just created, adding the video and audio assets to the menu, changing the name to 'Main_Menu' and setting the correct Display Mode. Continue this process for the remaining menus and transitions. Your outline tab should then look similar to this:
 Importing the Custom Shapes
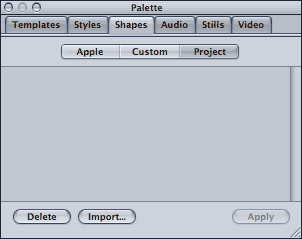
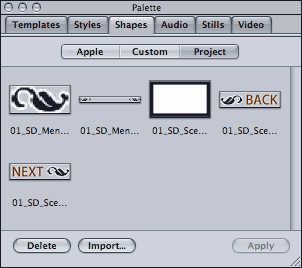
Let's get our custom shapes ready to drop into our menus. In the Palette (upper right), under the 'Shapes' tab, go to 'Project'.

Select 'Import' and locate the folder 'DVDSP_Button_Shapes' provided with the Pro Motion Menu Kit. Within this folder are three subfolders for each of the formats that your dvd could be (HD, SD, PAL). Open the one which corresponds to the format you are using, select all the files EXCEPT for the ones which say 'unrasterized', then click 'Import'. If you rasterized any buttons following the first step of this tutorial, be sure to import the new files you created instead of the default ones.
 Create Your Tracks
If you haven't done so already, now would be a good time to import your main videos for the dvd. Keeping your project organized is always a good idea, so you should create a folder for your main video assets which is separate from your menu assets.
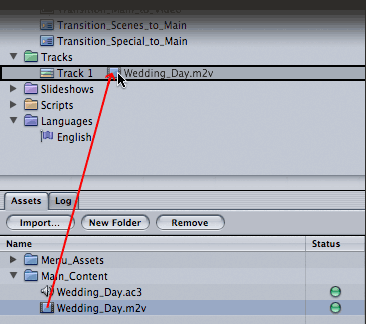
Lets create a separate track for each main video. Do this by dragging the video asset from the asset tab into 'Track 1' in the Outline tab.

Repeat this process for each of the videos you will have on the dvd. To add additional Tracks, click 'Add Track' in the Toolbar.
You should now be ready for the next step where we add the buttons to our menus and link everything together.
Next Page» STEP 3: Assemble Your Menus
